Info and more pictures under the cut!
Showing posts with label blue. Show all posts
Saturday, December 7, 2013
Week 1: Winter Challenge
After an incredibly long night of sleep last night, I spent most of today watching tv, biking, and planning what I wanted to do for today's mani. Aka the perfect weekend. So I sat down with a pot of peppermint tea and spent an ungodly amount of time bringing this mani to life.
Info and more pictures under the cut!
Sunday, December 1, 2013
Pastel Space
So if you know me, you know I love space. Like, a lot. My background on both my personal and work computer is not just one picture of space, but like 10 different ones that just rotate every half hour. I usually have glow in the dark stars on my ceiling. I really really love space. So naturally, when I'm on vacation and I have a very limited number of colors but I still want to do something fun, my go-to design is space. Pastel space!!
I started off with two coats of OPI Can't Find My Czech-book, which is a super super gorgeous blue and I can't believe how long it took me to convince myself to get it. Next I skipped my usual next step of sponging on white and went straight to the colors. The pink I used was OPI Tutti Frutti Tonga, which is a really gorgeous iridescent pale pink. I'm excited to use it alone at some point because it's gonna look great. The yellow was China Glaze Happy Go Lucky, which is basically my go-to for a nice bright yellow color. The glitter was OPI When Monkeys Fly, which is part of the Oz the Great and Powerful collection. (Coincidentally, I just saw that movie, and I thought it was great except for the part where I couldn't take James Franco seriously. He has such an insincere smile and it was just really throwing me off the whole time.) Ahem, anyways. the white star designs I did with a Sally Hansen nail art pen in white. I love these pens and will never ever be able to sing my praises for them enough, even though I'm super bitter towards Sally Hansen due to the fact that they totally ignored my suggestion to bring back the Sally Hansen Magical line, aka the best holo line ever to exist ever.
I think I've rambled enough for one day, look at my nails:
I started off with two coats of OPI Can't Find My Czech-book, which is a super super gorgeous blue and I can't believe how long it took me to convince myself to get it. Next I skipped my usual next step of sponging on white and went straight to the colors. The pink I used was OPI Tutti Frutti Tonga, which is a really gorgeous iridescent pale pink. I'm excited to use it alone at some point because it's gonna look great. The yellow was China Glaze Happy Go Lucky, which is basically my go-to for a nice bright yellow color. The glitter was OPI When Monkeys Fly, which is part of the Oz the Great and Powerful collection. (Coincidentally, I just saw that movie, and I thought it was great except for the part where I couldn't take James Franco seriously. He has such an insincere smile and it was just really throwing me off the whole time.) Ahem, anyways. the white star designs I did with a Sally Hansen nail art pen in white. I love these pens and will never ever be able to sing my praises for them enough, even though I'm super bitter towards Sally Hansen due to the fact that they totally ignored my suggestion to bring back the Sally Hansen Magical line, aka the best holo line ever to exist ever.
I think I've rambled enough for one day, look at my nails:
Friday, May 24, 2013
Day 8: Sloth
Hello lovelies! So as you might have noticed, I skipped day 7 of the Seven Deadly Sins challenge. That's because I just finished college and I've been spending the past week moving back home and such! So you can have my super lazy (but still cute!) modifacation to my previous mani that I'll be using for this Sloth entry.
All I did to make this different from my last nails was stamp using Winstonia plate 112 with Julep Eloise, which stamped beautifully! This was especially exciting because it was my first time stamping on textured nail polish. I'm really really happy with this mani overall. :)
Thursday, May 23, 2013
Textured brights!
Hello lovelies!! Ever since I heard about China Glaze's new textured line, I've been dying to pick up Of Coarse!, Itty, Bitty Gritty, and In The Rough. So far all I have is Of Coarse!, but I tried it out the other day (read: I painted my nails in the airport while I waited for my plane home), and fell in love!! I paired it with OPI Did It On Em (from the Nicki Minaj collection, which I'm in love with), and I'm so excited with the result!! The texture is just how I'd hope it would be, and it's the perfect amount of matte. It's bright in just the right way, and I can't stop touching it.
This pic really shows how fab the texture is, and how cool it looks right next to regular smooth-textured polish. I always always put topcoat on my nails, but for this textured polish, I'm gonna skip it so I can keep the texture the way it is!
I stamped some designs on this polish already, so I'll be posting the stamped version tomorrow!!
Saturday, May 11, 2013
Day 6: Greed
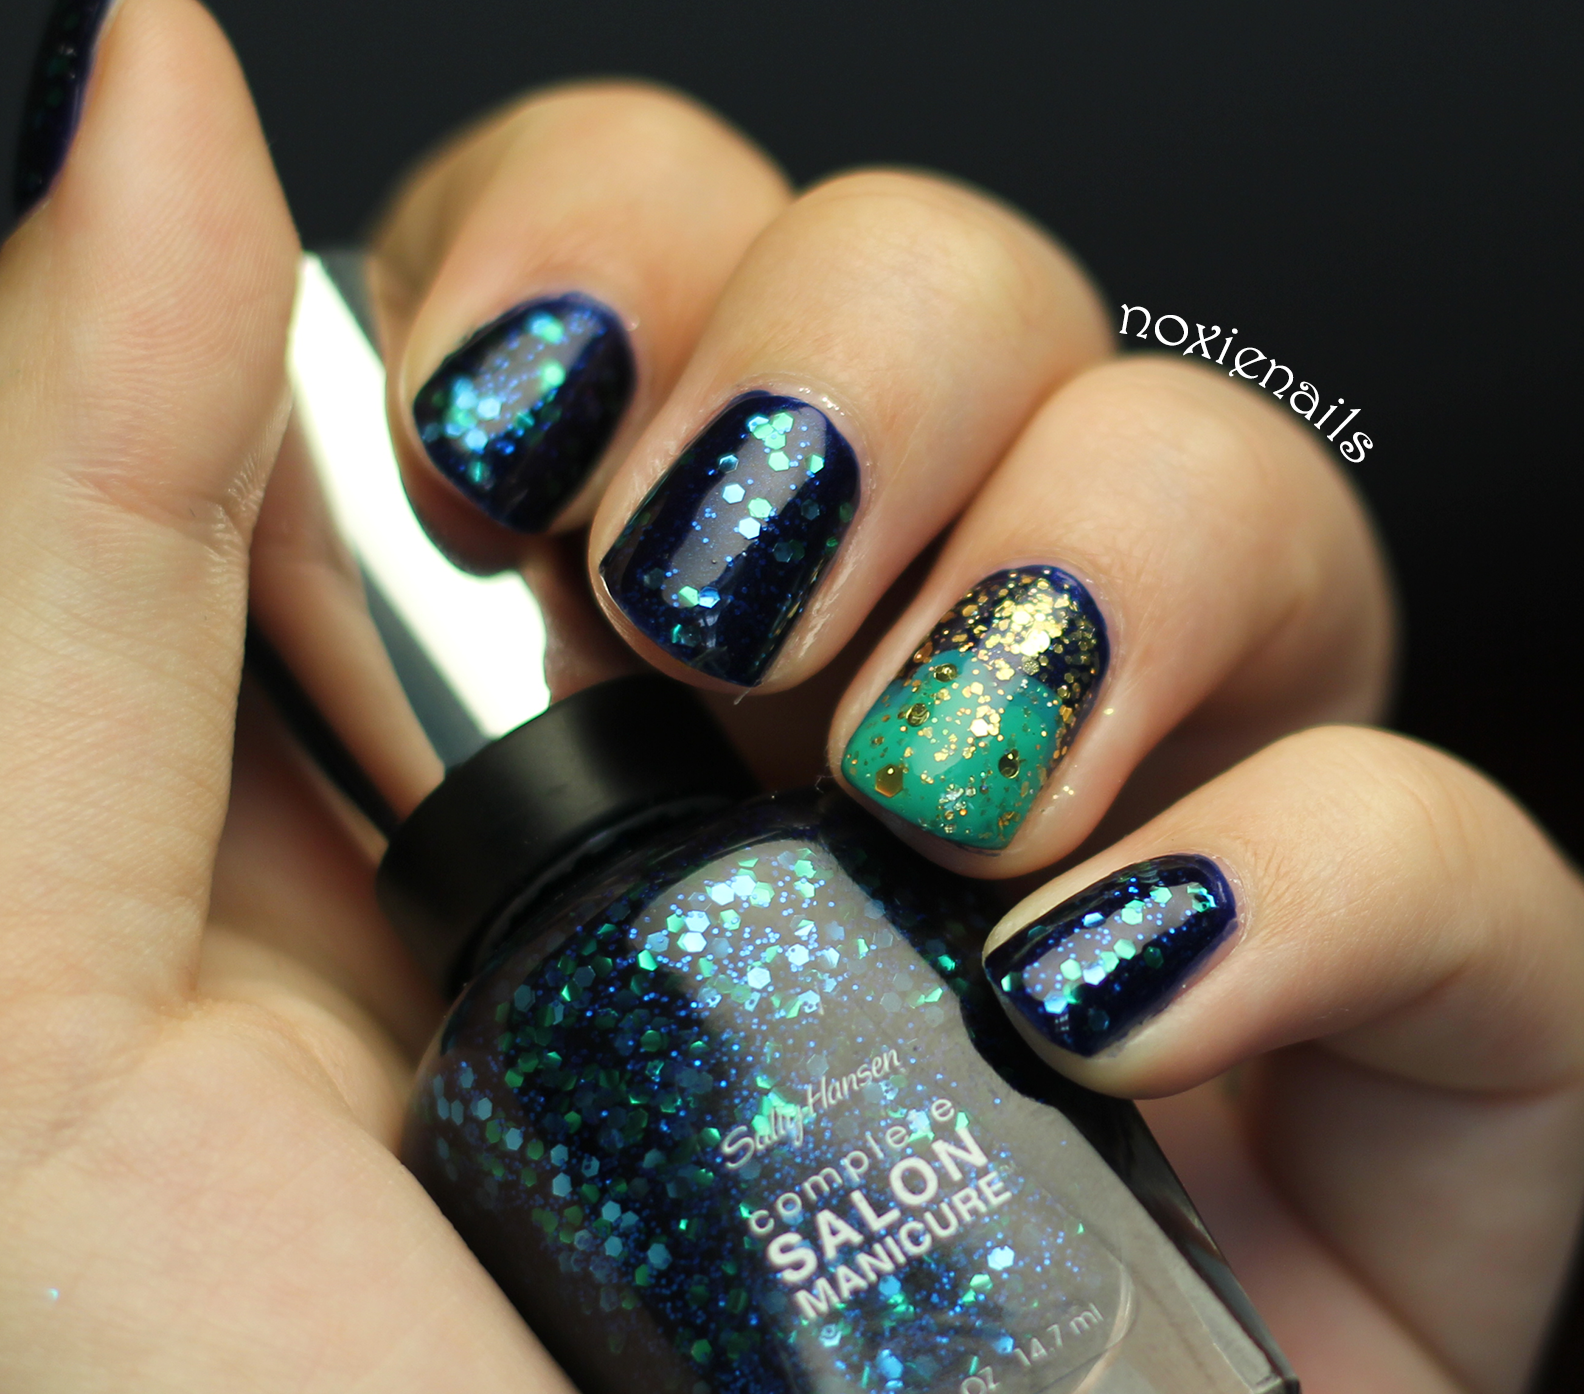
Hello lovelies! The theme for today was to go all out, so I did!! There's glitter galore on these deep blue mermaid-themed nails, and they look fab! Plus mermaids are known for collecting things, and thats somewhat greedy... right? (Goddamn it Ariel.)
For this mani, I used a base of two coats of OPI Yoga-Ta Get This Blue!, and topped that with Sally Hansen Mermaid's Tale. For my accent nail, I used a coat of I <3 NP's All Gold Everything, which I've been super stoked to use for AGES! (I got it from etsy so it's one of my extra-special babies.) On top of that, I used OPI Fly, and then China Glaze Four Leaf Clover, which I thought gave the nail something of a mermaid-scale look. However, the matte colors looked too plain to me, so I threw another coat of All Gold Everything onto it before topping everything off with two thick coats of SV. If you guys think it looks killer on here, imagine how great it is in person!!

Labels:
blue,
challenge,
china glaze,
freehand,
glitter,
indie polish,
OPI
Sunday, April 28, 2013
Spring Polka
Hello lovelies! I went to an event with some friends yesterday, and after one of them was shocked to find that I hadn't redone my nails in around three days, I jumped right on that and popped out a new design! I gathered up a rainbow of springy pastels, along with my brand new (and super cheap) dotting tools that I ordered on Amazon, and set to work! The dotting tools are super cute, although they took a while to get here (around 3 weeks, as they're from China), but with how adorable the set is, and for how cheap they were, the wait was well worth it!
For this mani, I used Butter London Trout Pout, China Glaze Peachy Keen, CG Lemon Fizz, CG Re-Fresh Mint, and CG For Audrey for the base colors, with CG White On White for the dots. The dotting tool was super duper easy to use, much better than the toothpicks and other makeshift tools I've been using!
More pics under the cut! <3
For this mani, I used Butter London Trout Pout, China Glaze Peachy Keen, CG Lemon Fizz, CG Re-Fresh Mint, and CG For Audrey for the base colors, with CG White On White for the dots. The dotting tool was super duper easy to use, much better than the toothpicks and other makeshift tools I've been using!
More pics under the cut! <3
Thursday, April 25, 2013
Rainbow Holo Stamped Flowers
Hey lovelies! Today I went out and took a bunch of pictures in the sun so I could try to catch some of the fabulous colors in Color Club's Halo Hues polishes, and even though I was able to get some pretty good shots, they still just don't capture how great this polish's holo is. Literally. Mindblowing.
The application for CC Over The Moon was fantastic, with two coats covering flawlessly. They also dried fairly fast, which was a plus. I then stamped with CC Beyond, which stamped excellently but I found that the polish itself was a little goopy. Kind of disappointed with the formula on that one, but maybe I just got a bad bottle? I hope so. I'd still recommend the polish to anyone looking for a stunning black holo. On my ring finger I stamped with OPI Yoga-ta Get This Blue, which came out way more transparent and blue than I was expecting (I was hoping for more of an opaque black with blue glitter), but I still like how it looks! It just doesn't fit in as an accent as well as I'd hoped.
More under the cut~
The application for CC Over The Moon was fantastic, with two coats covering flawlessly. They also dried fairly fast, which was a plus. I then stamped with CC Beyond, which stamped excellently but I found that the polish itself was a little goopy. Kind of disappointed with the formula on that one, but maybe I just got a bad bottle? I hope so. I'd still recommend the polish to anyone looking for a stunning black holo. On my ring finger I stamped with OPI Yoga-ta Get This Blue, which came out way more transparent and blue than I was expecting (I was hoping for more of an opaque black with blue glitter), but I still like how it looks! It just doesn't fit in as an accent as well as I'd hoped.
More under the cut~
(Preview) Rainbow Holo Stamped Flowers
Hello lovelies! This is just a preview of the post I'll make tomorrow where I show my new mani off now that it's all nice and fresh. Recently I purchased a 6 pack of the new Color Club Halo Hues, which I've been dying to try out, but I've been working through my list of manis to do that I haven't had time. So tonight I finally decided to go for it! I went with a base of Color Club Over The Moon, which covered my nails nicely in two coats. Then I tried to stamp flowers with BM-320 using CC Kismet, but it didn't show up at all, so I went with CC Beyond. As an accent on my ring finger, I used OPI Yoga-ta Get This Blue, which I had hoped would show up as more of a black, but I still think it looks ok.
Let me know what you think!! I'll make a sunlight post tomorrow. :)
Wednesday, April 10, 2013
Mermaid French Tape Mani
I've been in love with Revlon Minted for a while now, but it's sometimes just not quite blue enough for me. When I was checking out my stash, I realized that I had literally ZERO creme blues. So of course I went and immediately ordered the beautiful China Glaze For Audrey, a gorgeous exact match to Tiffany's shade of blue. When I got it, I just kind of admired it for a little while before trying to figure out what I was going to actually do with it.
Another polish that I've been ogling over for a few months now is OPI Mermaid To Order, which came in my big Sephora by OPI pack of minis. (What a great Christmas present that was!!) It's such a unique shade of blue though that I've had trouble trying to decide what I wanted to pair it with, but after holding For Audrey up to pretty much everything in my collection to find the best match, I realized that these two beauties looked like they were made for each other.
For Audrey went on perfectly smoothly and completely covering in one coat, but the idea of only having one coat of a main color on my nails is preposterous to me, so I threw a second coat on. I decided to try a tape mani for this design, and thought the colors I picked would look fab with a triangle French design, so I taped off my thumb after giving For Audrey about an hour and a half to dry (plus my UV nail dryer!!), and... realized that the tape was waaaay too tedious. The designs were coming out off center and crooked no matter how hard I tried, so I decided that I have a steady enough hand and just freehanded the rest of my nails. I think they came out great!
The colors blended together a little too much for my taste once I got them on my nails, so since I wanted them to stand out, I outlined the border using my Sally Hansen Nail Art Pen in White. The white one is my favorite because it's super opaque and easy to use; I was even able to do my right hand and make it look nearly as perfect as my left!! (I didn't take pictures of it, but trust me on that one.)
Overall, I'm super satisfied with this mani. Not only are the colors gorgeous together, but the quality and formula of each polish was flawless. I'm pretty sure this is my favorite mani I've done in a while!!
Let me know what you think :)
More pics under the cut!
Subscribe to:
Posts (Atom)